Steak – The Ultimate Guide: 4 Methods for Cooking a Perfect Steak

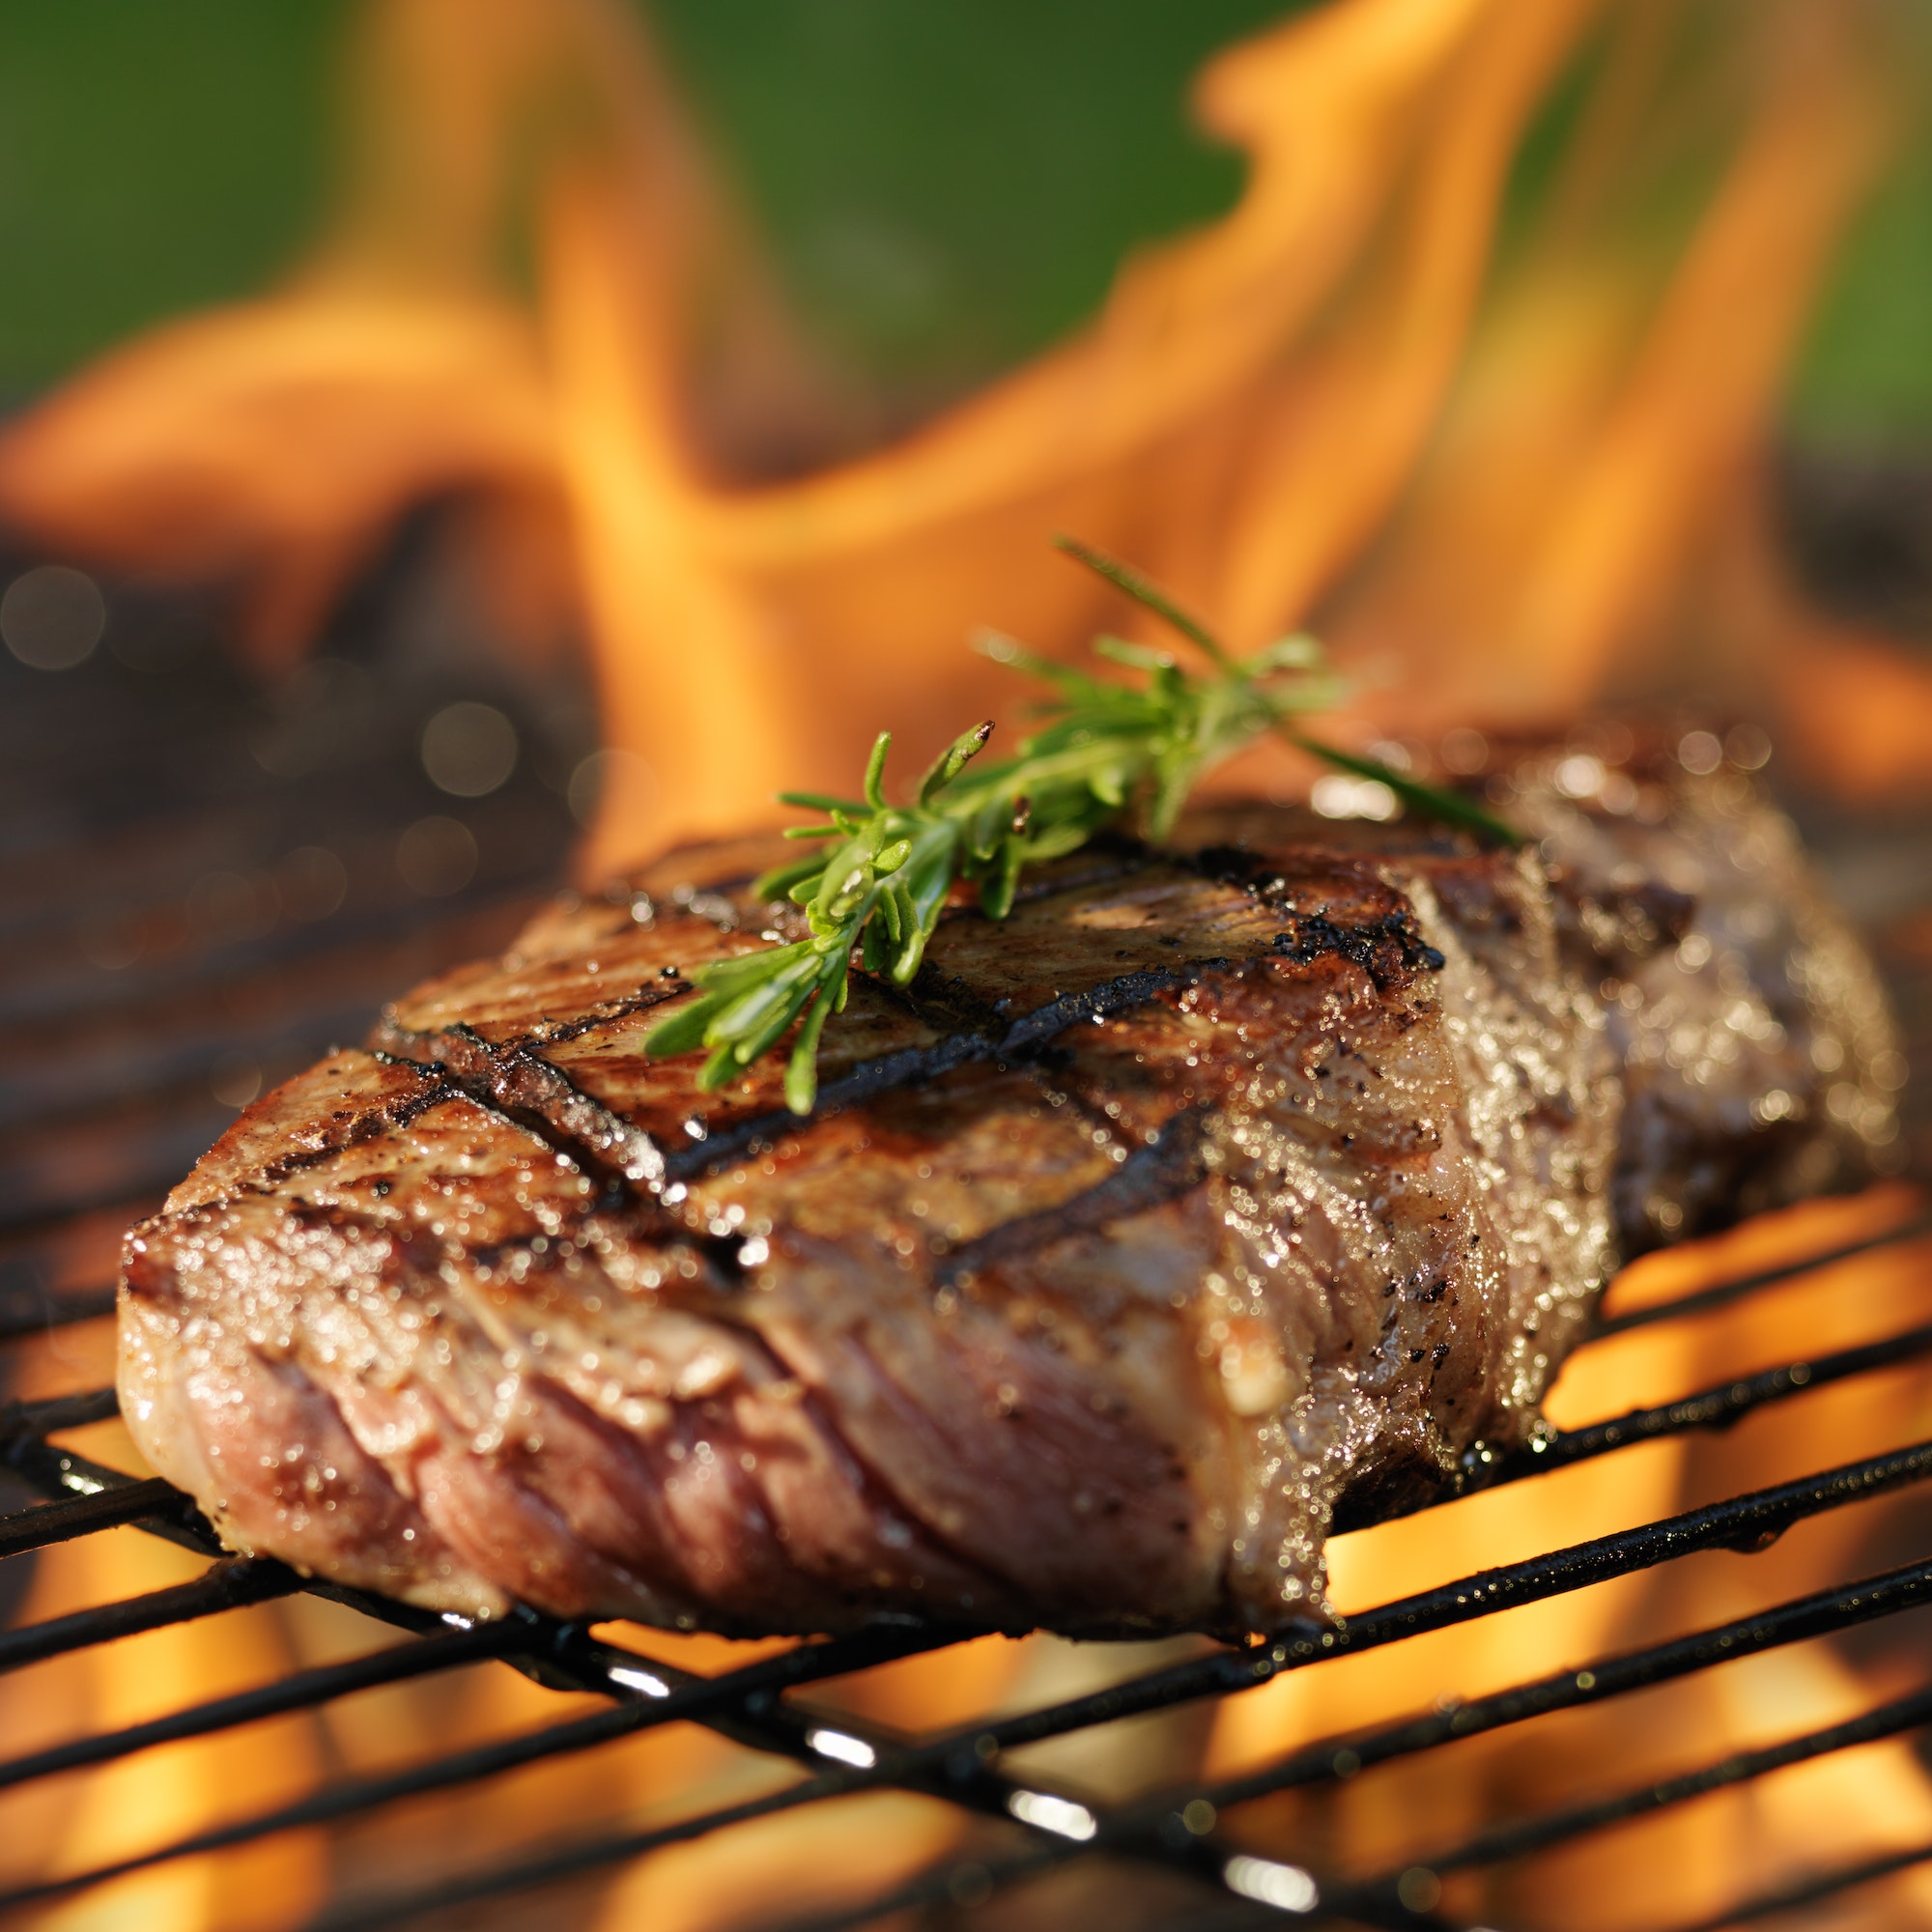
Table of Contents
Cooking a Perfect Steak
There’s nothing quite like the mouth-watering aroma of a perfectly grilled steak. Whether you’re a seasoned griller or new to the world of outdoor cooking, mastering the art of preparing a delectable steak is a skill worth honing. This comprehensive guide will walk you through everything from choosing the perfect cut of meat to mastering several cooking techniques, including the reverse sear.

Choosing the Perfect Cut of Steak
Not all steaks are created equal, and the cut you choose can significantly impact your final dish. Here are some popular cuts to consider:
Ribeye: Known for its rich marbling and bold flavor.
New York Strip: Leans towards the leaner side with a tender, beefy taste.
Filet Mignon: A luxurious choice, prized for its tenderness and subtle flavor.
T-Bone: Combines the New York Strip and the tender filet for a hearty steak.
Porterhouse: A larger version of the T-Bone, offering even more of the two prized cuts.
When selecting your meat, pay attention to marbling, the fat that runs throughout the meat, as it contributes to the steak’s juiciness and flavor. Opt for grass-fed beef when possible, and consider the difference between dry-aged and wet-aged steaks to suit your preferences.
Preparation
Taking the time to properly prepare your steak before cooking can greatly impact the final outcome. A well-prepared steak will cook more evenly, develop a beautiful crust, and be full of flavor. In this section, we’ll discuss the essential steps of preparing your steak, including seasoning, bringing the steak to room temperature, and prepping your grill or cooking surface.
Seasoning:
A well-seasoned steak not only tastes better but also helps create a delicious crust when cooked. There are several ways to season your steak, depending on your personal preferences and desired flavor profile.
Salt and Pepper: The classics – A simple combination of kosher or sea salt and freshly ground black pepper can enhance the natural flavors of the steak without overpowering them. It is important to season your steak generously, as some of the seasoning will be lost during the cooking process. For best results, season your steak at least 40 minutes before cooking, allowing the salt to penetrate the meat and improve its texture and flavor. If you don’t have 40 minutes, season right before cooking to avoid drawing out too much moisture.
Marinades: Adding more flavor – Marinades are a mixture of acidic ingredients (like vinegar or citrus juice), oil, and various seasonings used to tenderize and flavor the meat. To marinate your steak, place it in a resealable plastic bag or shallow dish and cover it with your chosen marinade. Allow the steak to marinate in the refrigerator for at least 2 hours or up to 24 hours for maximum flavor. Remember to discard the used marinade and pat the steak dry before cooking to prevent flare-ups and ensure proper searing.
Rubs: Creating a crust – Rubs are a combination of dry spices and herbs that create a flavorful crust when the steak is cooked. To create a rub, mix your chosen spices in a small bowl and then coat the steak evenly on all sides, pressing the rub into the meat. For maximum flavor, let the steak sit with the rub for at least 30 minutes or up to 2 hours in the refrigerator. Be sure to remove the steak from the refrigerator and let it come to room temperature before cooking.
Check out our article on elevating your cooking with spices!
Bringing the Steak to Room Temperature:
Allowing your steak to come to room temperature before cooking promotes even cooking and helps prevent the outside from overcooking while the inside remains undercooked. Remove the steak from the refrigerator and let it sit at room temperature for about 30-45 minutes before cooking. This will help the meat cook more evenly, resulting in a juicier and more tender final product.
Prepping the Grill or Cooking Surface:
Properly preparing your grill or cooking surface can make a significant difference in the quality of your cooked steak. For grilling, clean the grill grates thoroughly with a grill brush to remove any debris and prevent sticking. Then, oil the grates with a high smoke-point oil, such as canola or grapeseed oil, using a paper towel or grill brush. Preheat your grill to the desired temperature before placing your steak on the grates. For pan-searing, choose a heavy-bottomed pan like a cast-iron skillet or stainless steel pan and preheat it over medium-high heat for several minutes until it is hot but not smoking. Coat the pan with a high smoke-point oil and butter for optimal results.
Traditional Grilling
Grilling is a time-honored cooking method that imparts a smoky, charred flavor to your steak. To master the art of grilling, it’s essential to understand the differences between direct and indirect heat grilling and how each method can affect your final product.

Direct Heat Grilling:
This technique involves cooking your steak directly over the heat source, whether it be charcoal, gas, or an open flame. Direct heat grilling is ideal for thinner cuts of steak, as it quickly sears the outside while cooking the inside just enough without drying it out. To achieve success with direct heat grilling, preheat your grill to a high temperature (around 450-500°F) and place the seasoned steak directly on the grates. Cook for 2-5 minutes per side, depending on your desired level of doneness.
Indirect Heat Grilling:
Indirect grilling is a slower, gentler method that is perfect for thicker cuts of steak. With this technique, the heat source is positioned on one side of the grill, and the steak is placed on the opposite side. The grill lid is then closed, effectively turning the grill into an oven. This method allows the steak to cook more evenly and retain its juiciness. To use indirect grilling, preheat your grill and create a two-zone cooking area. Place the steak on the cooler side of the grill and cook for approximately 20-30 minutes, flipping occasionally until it reaches the desired internal temperature. Finish by searing the steak for 1-2 minutes per side on the hotter side of the grill.
To achieve perfect grill marks, place your steak at a 45-degree angle to the grates and rotate halfway through the cooking time for each side. This will create a diamond-shaped pattern that is both visually appealing and appetizing.
When using a charcoal grill, control the heat by opening or closing the vents on the bottom and lid of the grill. For gas grills, simply adjust the burners to maintain the desired temperature.
No matter which grilling method you choose, it’s essential to clean and oil your grates before cooking. This will prevent the steak from sticking and promote even cooking. Use a grill brush to clean the grates and apply a high-heat oil, such as canola or grapeseed oil, with a paper towel.
Additionally, refrain from poking or piercing your steak during the cooking process, as this can cause the flavorful juices to escape. Instead, use a pair of tongs to gently flip the steak when necessary.
Throughout the grilling process, monitor the internal temperature of your steak using a meat thermometer to ensure it reaches the desired level of doneness. Remove the steak from the grill when it is about 5°F below the target temperature, as it will continue to cook during the resting period.
Pan-searing
Pan-searing is a simple yet effective technique that can produce restaurant-quality steak in the comfort of your own kitchen. With the proper tools and a little know-how, you can achieve a perfectly cooked steak with a beautiful crust every time.
Choosing the Right Pan:
A heavy-bottomed pan, such as a cast-iron skillet, is ideal for pan-searing, as it retains and distributes heat evenly. These pans can also withstand the high temperatures necessary to create a beautiful crust on your steak. If you don’t have a cast-iron skillet, a thick stainless steel pan will also work.
Heating the Pan:
Preheat your pan over medium-high heat for several minutes until it is hot but not smoking. This will ensure that the steak develops a beautiful crust and cooks evenly.
Oil and Butter:
Use a high smoke-point oil, such as canola, vegetable, or grapeseed oil, to coat the bottom of the pan. This will help prevent the steak from sticking and create a nice crust. After the oil has heated, add a knob of butter to the pan. The combination of oil and butter will provide a rich, golden crust and impart additional flavor to the steak.
Searing the Steak:
Once the butter has melted and the pan is hot, carefully place the seasoned steak in the pan. Cook the steak for approximately 2-4 minutes per side, depending on the thickness of the cut and your desired level of doneness. Resist the temptation to move the steak during this time, as this will ensure proper browning and crust formation.
Basting:
To infuse the steak with even more flavor, consider basting it with the melted butter in the pan. Tilt the pan slightly to pool the butter, and use a spoon to continuously pour the butter over the steak as it cooks. This will result in a richer, more luxurious flavor and a beautiful golden crust.
Aromatics:
For an added depth of flavor, consider adding aromatic ingredients, such as garlic cloves, rosemary, or thyme, to the pan during the searing process. These ingredients will release their flavors into the butter and oil, creating a delicious, fragrant base for your steak.
Checking for Doneness:
Use a meat thermometer to ensure your steak reaches the desired internal temperature. For medium-rare, aim for an internal temperature of 130-135°F, for medium, 135-145°F, and for medium-well, 145-155°F. Keep in mind that the steak will continue to cook as it rests, so remove it from the pan about 5°F before it reaches your target temperature.
Reverse Sear
The reverse sear is a two-step cooking method that involves cooking the steak at a low temperature before finishing it with a high-heat sear. This technique is particularly well-suited for thicker cuts of steak, as it allows for greater control over the internal temperature while still achieving a beautifully seared crust.
Oven-roasting or Smoking:
The first step in the reverse sear method is to cook the steak at a low temperature until it is almost at the desired level of doneness. This can be accomplished by oven-roasting or smoking the steak. For oven-roasting, preheat your oven to 225-250°F and place the seasoned steak on a wire rack set over a baking sheet. Cook the steak in the oven for 45-60 minutes, or until it reaches an internal temperature about 10-15°F below your desired level of doneness. For smoking, set your smoker to 225°F and cook the steak for approximately 1 to 1.5 hours, depending on the thickness of the cut.
Finishing with a High-Heat Sear:
Once the steak has reached the desired internal temperature, remove it from the oven or smoker and let it rest for a few minutes. Meanwhile, preheat a cast-iron skillet or grill to high heat. When the cooking surface is hot, sear the steak for 1-2 minutes per side to create a beautiful, caramelized crust.
Benefits:
The reverse sear method offers several advantages over other cooking techniques. First, it provides more control over the internal temperature of the steak, resulting in a more evenly cooked final product. Additionally, the low-and-slow cooking process allows for better rendering of fat and collagen, leading to a more tender and flavorful steak.
Ideal Cuts:
The reverse sear method is best suited for thicker cuts of steak, such as ribeyes, porterhouses, and T-bones, which are at least 1.5 inches thick. These cuts benefit from the gentle, even cooking provided by the reverse sear technique, resulting in a perfectly cooked interior and a beautifully seared exterior.

Resting and Serving:
After searing the steak, allow it to rest for at least 5-10 minutes before slicing. This will help the juices redistribute throughout the meat, ensuring a juicy and tender bite. When slicing, be sure to cut against the grain to shorten the muscle fibers and further enhance the steak’s tenderness.
Tips for Success:
To achieve the best results with the reverse sear method, consider these tips:
- Use a reliable meat thermometer to monitor the internal temperature of the steak during the oven-roasting or smoking stage. This will ensure that you don’t overcook the steak before searing.
- Be patient and allow the steak to cook slowly during the first stage. This will help the fat and connective tissue break down, resulting in a more tender and flavorful steak.
- Preheat your cooking surface to a high temperature for the searing stage to ensure a beautiful crust forms quickly, locking in the steak’s juices.
- Experiment with different seasonings, rubs, and marinades to find the flavor combination that suits your taste.
By mastering the reverse sear method, you’ll be able to consistently produce perfectly cooked, tender, and flavorful steaks that are sure to impress your family and friends.
Sous Vide Method
The sous vide method is a cooking technique that involves sealing food in an airtight plastic bag and then submerging it in a temperature-controlled water bath for an extended period. This method allows for precise temperature control and slow, even cooking, which can produce incredibly tender and juicy steaks with minimal risk of overcooking.
Equipment:
To cook a steak using the sous vide method, you will need a few essential pieces of equipment:
- Sous vide immersion circulator: This device heats and circulates the water in your container, maintaining a precise temperature throughout the cooking process.
- Airtight plastic bags: These bags hold your steak and keep it submerged in the water bath. You can use resealable plastic bags or vacuum-sealed bags.
- A container or large pot: This holds the water bath in which the steak will cook.
- Tongs or a slotted spoon: These are used to safely remove the steak from the water bath.
- A cast-iron skillet, grill, or blowtorch: These are used to finish the steak with a quick sear, creating a delicious crust.
Preparation:
Before starting the sous vide process, season your steak with your preferred seasoning – whether it be a simple combination of salt and pepper, a dry rub, or a marinade. If using a marinade, be sure to pat the steak dry before placing it in the plastic bag. Place the seasoned steak in an airtight plastic bag, removing as much air as possible before sealing. If using a vacuum sealer, be careful not to over compress the meat.
Cooking the Steak:
Fill your container or pot with water, attach the immersion circulator, and set it to your desired temperature. The ideal temperature depends on your preferred level of doneness:
Rare: 120-128°F
Medium-rare: 129-134°F
Medium: 135-144°F
Medium-well: 145-155°F
Well-done: 156°F and above
Once the water bath has reached the set temperature, submerge the sealed steak in the water, making sure it is fully submerged. Cook the steak for the following approximate timeframes, depending on the thickness:
1 inch thick: 1-2 hours
1.5 inches thick: 2-3 hours
2 inches thick: 3-4 hours
These time frames provide a window of flexibility, as the precise temperature control of the sous vide method prevents overcooking. However, it is not recommended to cook the steak for much longer than the suggested time, as this can result in a mushy texture.
Finishing the Steak:
After the steak has cooked in the water bath, remove it from the bag and pat it dry with paper towels to remove any excess moisture. This is essential for achieving a beautiful crust during the searing process. Preheat a cast-iron skillet, grill, or blowtorch to high heat. Sear the steak for 1-2 minutes per side, or until a caramelized crust forms. If using a blowtorch, be sure to keep the flame moving to avoid burning the steak.
Check out this Torch Attachment for that Perfect Sear!

Resting and Serving:
Allow the steak to rest for about 5 minutes before slicing to let the juices redistribute. Slice against the grain and serve immediately, enjoying the tender, juicy, and evenly cooked steak that the sous vide method produces.
Conclusion
Exploring different cooking techniques, such as traditional grilling, pan-searing, and the reverse sear, can elevate your steak game and help you discover your preferred method for achieving the perfect steak. Remember that practice makes perfect, so don’t be afraid to experiment with various cuts, seasonings, and techniques to find the combination that works best for you. Share your successes and experiences with fellow steak enthusiasts, and enjoy the journey to the perfectly grilled steak.